
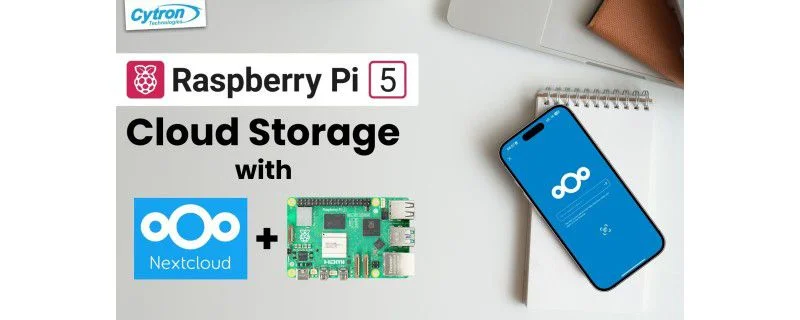
Introduction to Raspberry Pi Personal Cloud Storage
What is Personal Cloud Storage?
Imagine having your own private storage space accessible from anywhere in the world without relying on third-party services like Dropbox or Google Drive. Personal cloud storage lets you store, manage, and share your files on a server that you own and control. Instead of handing over your data to corporate servers, you create a private cloud, giving you full control over your information and privacy.
For many, this means setting up a server at home or office that can be accessed remotely, allowing seamless synchronization of photos, documents, calendars, and contacts across multiple devices. It’s like having your own personal Dropbox, but the server is completely yours.
Benefits of Using Raspberry Pi for Cloud Storage
Raspberry Pi is a small, affordable, and energy-efficient single-board computer that has gained immense popularity for DIY projects. When it comes to setting up personal cloud storage, the Raspberry Pi offers several advantages. First, its low cost makes it accessible for hobbyists and professionals alike. Second, its compact size means it won’t take up much space on your desk or shelf.
One user shared their experience of replacing expensive cloud subscriptions with a Raspberry Pi-based Nextcloud server. They now have full ownership of their files and enjoy fast local network speeds for file transfers while maintaining remote access when traveling. This balance of affordability, flexibility, and privacy makes Raspberry Pi an ideal platform for personal cloud storage.
Required Hardware and Software
Choosing the Right Raspberry Pi Model
While earlier Raspberry Pi models can handle basic tasks, setting up a personal cloud requires sufficient processing power and memory for smooth operation. The Raspberry Pi 5 with at least 4GB RAM is highly recommended, as it efficiently handles applications like Nextcloud and can support multiple users without significant slowdowns.
Think of it as choosing the right engine for your car; a more powerful Pi ensures that your cloud service runs reliably and supports tasks like file synchronization and media streaming without lag.
Essential Accessories and Storage Options
Beyond the Raspberry Pi itself, storage options are crucial. Many beginners make the mistake of relying solely on the microSD card for file storage, which can quickly wear out and cause data loss. Instead, consider using an external 2.5-inch SSD connected via USB. This setup provides faster read/write speeds and better longevity.
Additional accessories include a reliable power supply, Ethernet cable or Wi-Fi adapter for network connectivity, and a USB enclosure for the SSD to protect the drive and ensure easy connectivity. Having these components ensures smooth and reliable operation of your personal cloud server.
Nextcloud Overview and Installation Requirements
Nextcloud is an open-source platform designed for self-hosted cloud storage and collaboration. It allows users to store files, calendars, contacts, and more while managing sharing permissions and encryption. What makes Nextcloud stand out is its active community and regular updates, making it a robust choice for personal clouds.
For installation, you’ll need a Raspberry Pi with compatible OS, storage for Nextcloud data, network connectivity, and access to the internet for updates. Nextcloud supports installation via manual processes or convenient snap packages, simplifying setup for less experienced users.
Preparing Your Raspberry Pi
Installing Raspberry Pi OS
Begin with downloading the latest Raspberry Pi OS image from the official website. Flash it onto an SD card using tools like Raspberry Pi Imager or Balena Etcher. In one real-life scenario, a user saved hours of frustration by using these user-friendly tools instead of trying command-line instructions, allowing immediate boot-up and configuration once the SD card was inserted and the Pi powered on.
Once the Pi boots, you’ll be greeted with an easy-to-follow desktop environment or command line interface depending on your setup, ready for the next steps.
Configuring Network Settings
Stable network connection is vital since the Raspberry Pi will act as a cloud server accessible both locally and remotely. For best results, connect your Pi via Ethernet to your router, ensuring faster and more reliable speeds. If wiring isn’t convenient, set up your Wi-Fi carefully, making sure the SSID and password are correctly entered.
One user recounted having connection dropouts during setup because they failed to check signal strength and router settings. Taking the time to verify network stability before proceeding helps avoid frustration later when accessing files remotely.
Setting Up Security Basics

Security is paramount when self-hosting your own cloud. Begin by changing the default Pi user password to a strong, unique passphrase. Next, configure your firewall to restrict unnecessary ports and enable SSH only if remote terminal access is needed.
In a practical example, a hobbyist who neglected these basics experienced unauthorized login attempts and had to rebuild their server from scratch. Early focus on security saves time and protects your data from malicious actors.
Installing Nextcloud on Raspberry Pi
Manual Installation vs. Using Snap Package
There are two common methods to install Nextcloud on your Raspberry Pi: manual installation and the snap package approach. Manual installation offers more control by allowing you to configure each component such as the web server, database, and PHP settings separately. However, it requires familiarity with Linux commands and system administration.
Conversely, the snap package method provides a quick, all-in-one installation with automated handling of updates, HTTPS certificates, and networking. For newcomers or those who prefer simplicity, using snap is a safer and less time-consuming choice.
Step-by-Step Installation Guide
To install via snap, the basic steps are flashing Raspberry Pi OS, ensuring network connectivity, and running the command sudo snap install nextcloud. The snap package will handle dependencies and initial configurations. After installation, access the Nextcloud web interface by navigating to your Pi’s IP address in a browser. From there, create your administrator account and begin personalizing your cloud.
A user reported that following this approach allowed them to bypass configuring Apache and MySQL manually, enabling them to focus on uploading and syncing files almost immediately.
Common Installation Troubleshooting Tips
During installation, common hiccups include insufficient storage space, network timeouts, or permission errors. Verifying your SSD is correctly mounted and has enough free space prior to installation prevents many issues.

Additionally, if the web interface doesn’t load, checking firewall settings and confirming that the snap service is running can pinpoint problems. Taking incremental backup snapshots during setup can save hours of rework if something goes wrong.
Configuring Nextcloud for Optimal Use
Creating User Accounts and Permissions
Once Nextcloud is operational, setting up user accounts carefully ensures appropriate access control. For example, in a household scenario, parents might want to restrict their children’s access to sensitive documents while sharing photo albums with all family members.
Nextcloud allows you to create multiple users and groups, assigning permissions to shared folders and apps accordingly. Limiting the number of users to 2-3 on a Raspberry Pi device helps maintain smooth performance.
Setting Up External Storage Integration
Integrating external USB SSD storage with Nextcloud ensures you have ample space for your files and improved reliability compared to SD cards. Configuration usually involves mounting the SSD on the Pi and adding its path within Nextcloud’s external storage settings.
A user who initially stored data on the microSD card noticed slower upload speeds and frequent corruption. Switching to USB SSD resolved these issues dramatically, highlighting the importance of proper storage integration.
Optimizing Performance on Raspberry Pi
Performance optimization includes limiting simultaneous active users and minimizing heavy applications running alongside Nextcloud. For example, avoid running media servers or other intensive tasks on the same Pi unless it has higher specs.
Regularly updating Nextcloud and the Raspberry Pi OS, along with clearing unused files and apps, keeps your cloud responsive. Users who maintained a tidy setup reported faster file syncs and a more pleasant overall experience.
Accessing and Using Your Personal Cloud
Connecting via Web Interface and Desktop Clients
Accessing your cloud via a web browser is straightforward; enter the Pi’s IP address or your custom domain in the browser and log in. For convenience, Nextcloud offers desktop sync clients for Windows, macOS, and Linux, allowing you to synchronize folders automatically.
One experienced user shared how setting up desktop clients enabled continuous backup of important work documents without manual uploads, giving peace of mind during hectic workdays.
Mobile App Setup and Synchronization
For mobile access, Nextcloud provides apps for iOS and Android. Installing these apps lets you sync photos, contacts, and calendars directly from your phone to your personal cloud. This real-time backup prevents data loss if your phone is damaged or lost.
A photographer friend uses the mobile app to immediately upload photos after a shoot, freeing up phone storage and ensuring their work is backed up securely without third-party cloud fees.
Advanced Features and Tips
Enabling Encryption and Data Security
To protect sensitive data, Nextcloud supports server-side encryption and HTTPS for secure connections. Setting up SSL certificates via tools like Let’s Encrypt ensures your data is encrypted during transit.
In one household, enabling encryption was critical after a ransomware scare exposed the importance of having encrypted backups to prevent data theft and loss.
Automating Backups and Updates
Automated backups and software updates reduce maintenance efforts and improve reliability. Scheduling periodic backups to external drives or cloud storage prevents data loss due to hardware failure.
Similarly, enabling automatic updates for Nextcloud and Raspberry Pi OS ensures you have the latest security patches and feature improvements without manual intervention.
Integrating Additional Nextcloud Apps
Nextcloud’s app marketplace offers features like calendar, mail integration, and collaborative document editing. Adding these apps transforms your personal cloud into a full productivity hub.
A startup founder used Nextcloud apps to streamline project collaboration among team members without exposing data to third-party services, illustrating the platform’s versatility beyond simple storage.
Conclusion and Future Enhancements
Summary of Key Steps
Setting up a Raspberry Pi-based personal cloud storage with Nextcloud involves choosing appropriate hardware, installing the OS, configuring network and security basics, then installing and customizing Nextcloud. Ensuring external SSD storage and limiting users helps maintain performance while web and mobile clients provide accessible connectivity.
Adopting these steps equips users with a powerful, private, and cost-effective cloud solution tailored to their needs.
Scaling Your Cloud Storage Solution
As your cloud grows, consider scaling by upgrading Raspberry Pi hardware, adding network-attached storage (NAS), or moving to managed Nextcloud hosting for enterprise-grade features. One user started with a simple Pi 4 setup and, after gaining confidence, expanded to a multi-drive NAS with automated backups and redundant storage for critical data.
With careful planning and gradual improvements, your personal cloud can evolve to meet greater storage and user demands while maintaining privacy and control.


